
You will notice i failed to put two of the small knobs on - this is due to discovery of an issue that i did not realize until near the end, and at the moment i am not willing to back out and redo a bunch of soldering - i just really want to move on to the next panel and fix the mistake there. the issue arose despite my best planning for which controls would go on which of the four heads of the UMC. the last one was gooing to have 6 analog pots and 2 digital buttons.... unfortunately the UMC DIP switch settings for the last head only allow for 0, 2, 4, or 8 analogs... so i did not even wire up the last two pots. thus the lack of knob, which will be an obvious sign to me when playing it that nothing is attached to those controls. i'll fix it later. for the next identical panel i am spreading the analogs out more.
Other issue is a soldered and wired up the volume knobs to the LEDs before realizing my original design, and much more sense from a space perspective, is that they should be swapped with the pan knobs, smaller all black with vertical white line seen at the bottom of the panel. the other panels will correct for this as well.
And i am still having the LED issue - the two volume knobs are acting like log pots and giving me fits when trying to fine adjust volume of a track.... such is life. if the next one does it too, i may just unlink the LEDs from the volume and give them power. it was a good thought, although i admit to stealing it from a youtube video DIY project.
Another thing i discovered - although i intentionally waited to attach the knobs until each pot was confirmed good (because they won't come back off without serious risk to the panel), it has a price. the leverage needed to squeeze them onto the shaft is gone with the crazy wire mess in the back, trying not to touch wires and solder joints, etc. the result is some knobs i can't get all the way on, so they have slight variations in elevation from the base of the panel. not sure if its obvious in these pics.
Only other issue i have seen thus far is a couple of the illuminated buttons are acting strange in ableton - not sure if it is maybe a setting i have in ableton rather than the buttons... problem is they are assignable, ableton recognizes them, but when i assign them to things like mute or stop, they only operate once (mute track, but will not unmute, or vice versa). after i click manually with mouse, they will perform the operation once, and not again. not sure what that means.
Overall though pretty good success - all controls responding and i assigned the entire thing to a new set in ableton just to test it all out. hopefully some of the bugs go with it soon.
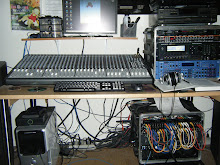
Here is a profile pic just to give an idea of the crazy mess of wires on the underside. it would probably look better were i more professional about it:

Starting on the next panel ASAP, and after getting the hang of it and discovering a few tricks, its moving faster. No pics but jnet's dad is done with the rear doors, the corner trim, and the shelf for the UMC's to attach to.


No comments:
Post a Comment